DIY Renovation Tools

Tools Used to Transform Our Cottage from Single Wall to Double Wall Construction
Over the years my husband and I have tackled and completed a variety of DIY home renovation and remodeling projects. As a result, we've had to utilize many different renovation tools, both power and hand tools.
All the DIY tools featured on this page were used by my husband and myself to recently renovate our small cottage in Hawaii. These tools are dependable, affordable and user friendly for both men and women; I can personally attest to that. :)
We began this latest project in June; the remodeling took us the entire summer. We are moved back into our home now, but still have lots of finish work to do. (Stay tuned for further pages, but for now I'd like to share with you some of the tools we used during the course of the project.)
Photo credit: Pam Irie
Power Tools for DIY
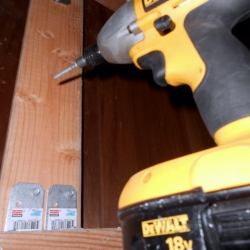
Must Have Combo in DIY Renovation Tools - DeWalt 18Volt Drill/Driver Combo Kit
Our DeWalt driver is pictured in the lead photo of this article. It's the perfect tool for driving hex nuts.


What Single Wall Construction Looks Like
The Inner Wall and the Outer Wall are the Same Board
Here's a closer look at the traditional single wall construction which was previously the norm in Hawaii several decades ago. "Single wall" basically means the interior wallboard IS also the exterior wall.
Our single-wall cottage is exactly the type of dwelling commonly built in Hawaii until the early 1960s. ONE single wall, without insulation. All electrical wiring, the outlets and switch boxes are mounted on top of the boards with wood molding made specifically to cover the wiring.
No heat or air conditioning, of course, but none is needed in the area of the island we live in. Single wall construction also means no insulation in the wall and that fact meant increased noise even in the quiet neighborhood we live in.
We love our home, but we were definitely ready to make some changes!
(Photo credit Pam Irie)
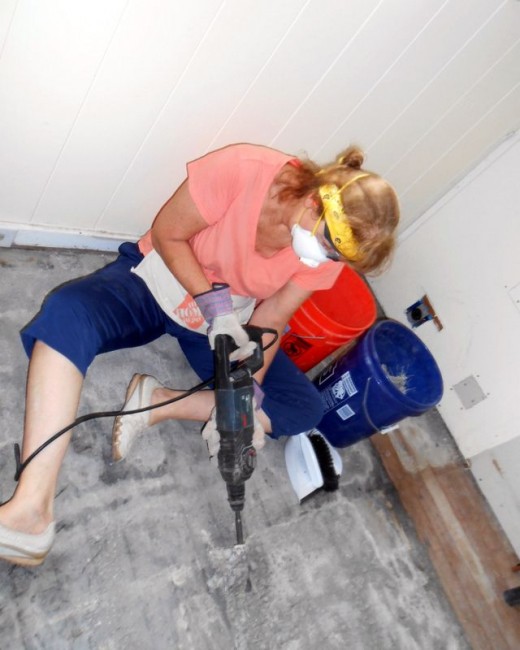
I'm Sitting Down on the Job!
One of the most time consuming parts of the demolition process involved removing the ceramic floor tile in the kitchen. We began with the usual hand tools and found this to be a very tedious and slow method.
A coworker of my husband's had an electric jack hammer with spade attachments and offered its use. This was my first time using this tool and I was so grateful to learn what a time saver it truly was. It didn't take me long to figure out just the right slant to use while holding it for the quickest demo. What a welcome contribution the loan of this tool turned out to be!

Electric Jack Hammer for Demolition
The electric jack hammer pictured below is the one that we would someday like to own. It will definitely make quick work of a heavy duty job!

Pause for a Poll

Are you more comfortable using power or hand tools for do it yourself projects?
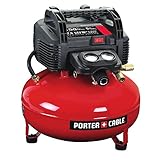
The Compressor We Use
Finish Nail Gun

This power tool is one of my favorites! I love how quickly I can install wood trim with this Porter Cable finish nail gun. It's a great tool.
After a few minutes use, you'll find how much easier and faster wood trim installation is when you use a nail gun rather than driving nails by hand. (FYI....you will need an air compressor to use this tool. I've highlighted the one we use on the right side of the page if you're interested. It's available from Amazon with FREE shipping.)
Hand Tools for DIY

Keep These Handy Tools Nearby
You'll need all of these hand tools for demolition and some for rebuilding. Two different sizes of crowbars are useful, a quality sledgehammer and of course, a level is necessary for framing too.
My husband has this kind of "quirk" regarding these particular tools. After basic demo is finished he keeps these tools nearby in a corner in case they may be needed. Some kind of builder's superstition if you take the tools out too soon, it could signify a real delay in completing the job. ;)

Measure Accurately with a Folding Carpenter Ruler
Get one with a 6 inch extension!
Measuring accurately before cutting wood trim can be challenging even in the best of times. We found that using a 6 ft folding ruler with a 6 inch extension makes the job a whole lot easier.
(You know how the metal measuring tapes can bend at exactly the wrong time, right? Well these folding rulers totally eliminate that problem...try one and you'll see exactly what I mean!)
Using a Folding Wood Ruler - TIPS!
Great tip here for accurate angles.
Highlighting the 6 inch extension portion of this great ruler.
Don't forget......Safety First!
Safety First!
Remember to always work safely on any DIY project.


Renovating Our Cottage - Summer 2013 - Random Shots Of Demo and Remodeling
Click thumbnail to view full-size


")


")


 :)")


")


")


 :)")


